Friday, August 5, 2016
Creative Chemistry 103: Day 4, Post 2
the following 3 posts are just so I can get the photos up to the Online Card Class gallery...to see the full day, see my blog post HERE.


Creative Chemistry 103; Day 4 --Distress Crayons!
Today’s lessons are all about the Distress Crayons…and I’ll
confess; while new to my craftroom, I’ve become a Gelato addict…so when I saw the crayon video’s from CHA, I was very excited, as these would be more “earthy”
colors. So after trying the set out, I was a bit bummed. Close but not the same as gelatos…but now! The
lessons show the differences and why and how to best use them. So Com’on rest
of the colors!! I’m going to get the
other 2 sets this weekend!

First up was the Crayon Smudged Technique. My stencil is not the best choice; too much
depth/roughness to truly smudge, (my fingers not happy! LOL!) but I’ve got the
gist, and will rework it this weekend--plus I need to make a mask for the postage edges...I'm only so neat!
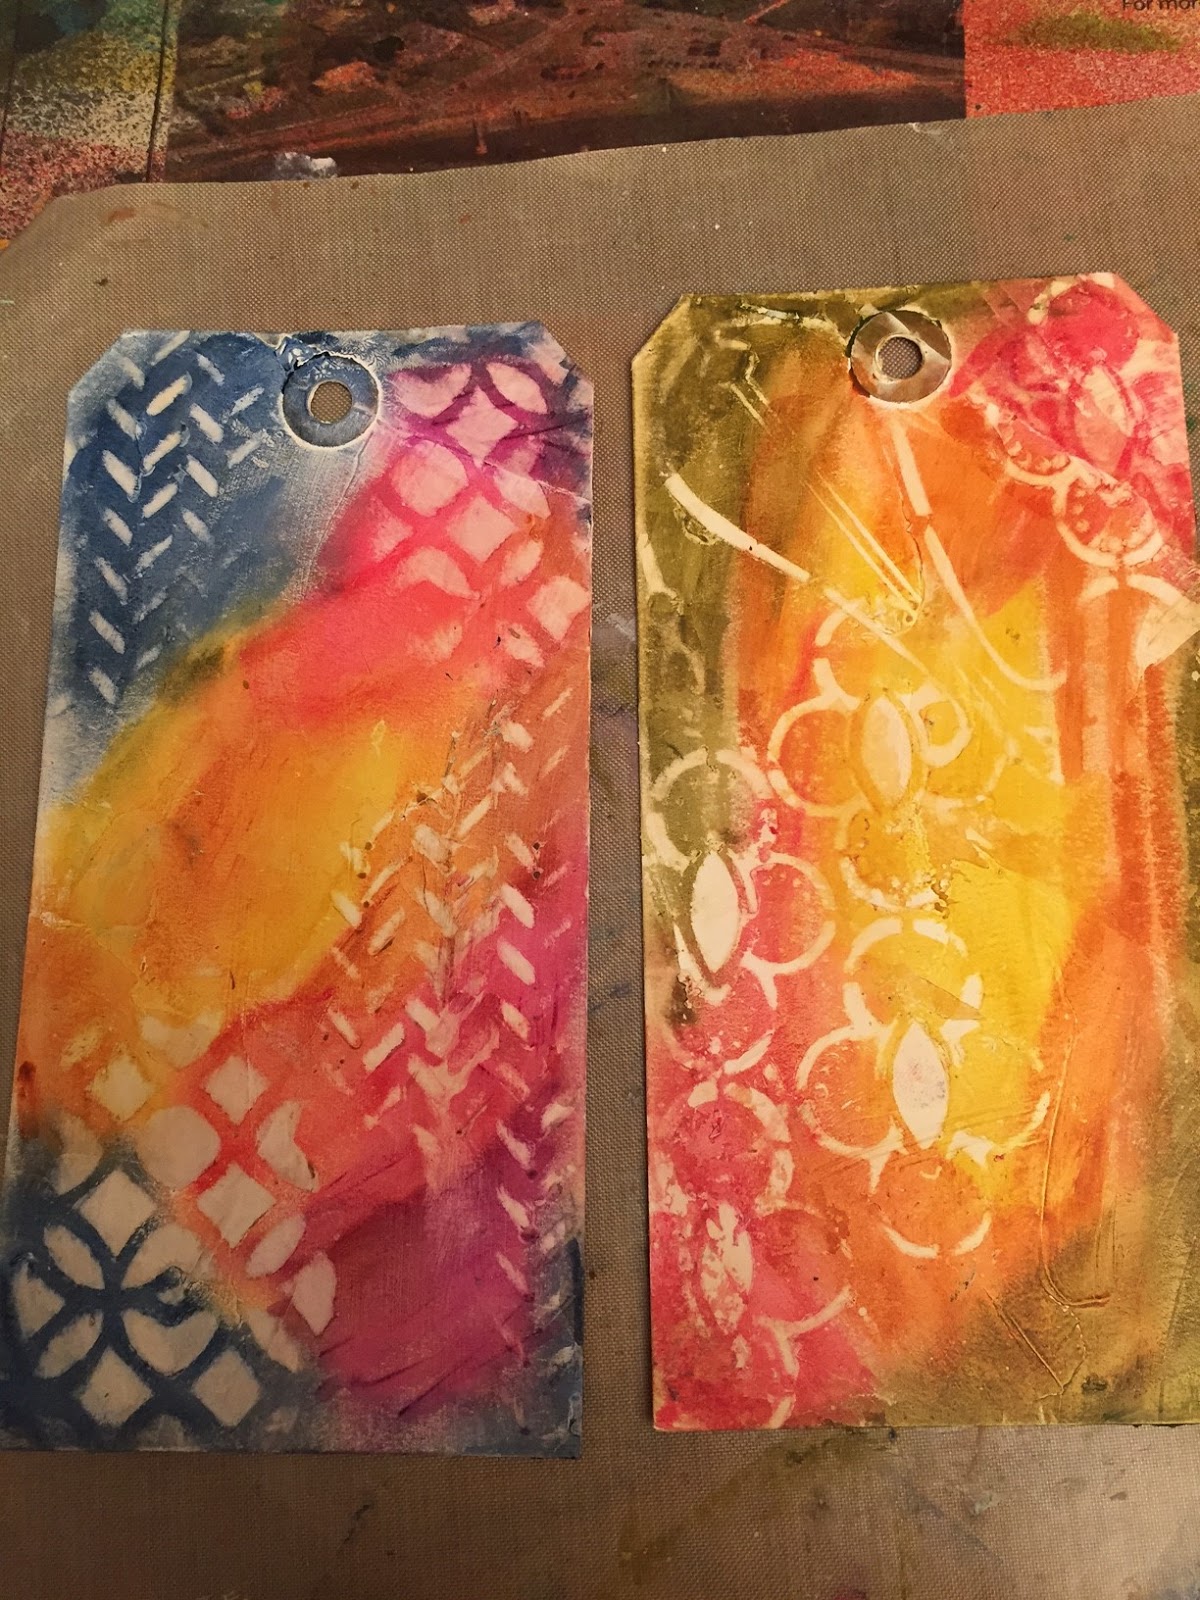
Then there was the Crayon Gesso Fresco…and Holy
Camoly! This is going to be stunning in
a journal! I got carried away, despite my time restraints, and did a bunch;
here are the better 2.

Then the Textured Resist. I picked another tricky tight
stencil…but still love how it came out; but now I really need the white crayon.

And finally the Watercolor Resist Technique…and this too
shows great possibilities! Here is just
the image; I ran out of gas to finish the card I have in mind..so stay tuned.

So with luck, after the Day 6 lessons on Saturday, I’ll
be able to catch up on the 6-7 techniques I missed during the week…and then
actually start to use them, not just do the exercises. So stay tuned!
Thursday, August 4, 2016
CC103 day 3 post 2
All the details of my Day 3 experiences are on the previous post, but I can't find a way to post multiple pictures from the same link..so this is just the photo. And I can't get their video on their inlink tool to work...so here you go...just the tag from the texture paste embossing technique.

Which, by the way....ROCKS!

Which, by the way....ROCKS!
Creative Chemistry 103 Day 3--Texture Paste front and center!
More experiments from the Creative Chemistry 103 class at Online Card Classes. Thankfully my texture paste sample pack and grit paste arrived that morning....otherwise I'd really be behind. As it was, it was not my best evening. My little tin foil pan I got out to soak my stencils in so I wouldn't have to waste time washing everything between steps must have had a pinhole. I start hearing a tapping, find it's water running down my desk onto the trimmer on the floor! the whole desktop was flooded...which I should have noticed sooner as my stamping mat slipped a little, which was weird. And, even though it wasn't hot, it was more humid than I thought, so the paste took forever to dry. Will bring a fan upstairs to try these again.
 So all I have to show are my sample tags, and just on the Texture Paste Coloring and Embossing techniques. I also did the texture paste sample tag, but did it backwards, and also forgot that Tim said to watch out for too wet application, So by the time I got all dried up, I went with quick and sprayed the hell out of it, and yes, the color does go under the paste.
So here is the first one, the Texture Paste Coloring Technique...and this shows promise! In the past I've colored my molding paste with either paint or gelatos, and yes, it does change the color. I love how the colors stayed true. I used distress paint on the top, a little mowed lawn spray stain bottom and a dash up top, and then regular distress inks everywhere else. I can't wait to try this again for real!
 And then the Texture Paste Embossing technique!! HOLY CRAP! while this might be a more limited application...it does have a WOW factor! I never really like the Queen's Gold EP, but it was the first jar I grabbed, and it was perfect for this...adding the Hickory smoke, salty ocean and peacock feather inks, and it popped!
So there is my day 3 experiences...I have 2 lessons to catch up on (I have never liked my collages, so that is a "if there's time" one) plus whatever today holds...yup, I really need to retire!!
Thanks for stopping by.
Oh and am I the only one that smells lemon custard with the transparent glossy texture paste?

So here is the first one, the Texture Paste Coloring Technique...and this shows promise! In the past I've colored my molding paste with either paint or gelatos, and yes, it does change the color. I love how the colors stayed true. I used distress paint on the top, a little mowed lawn spray stain bottom and a dash up top, and then regular distress inks everywhere else. I can't wait to try this again for real!
 And then the Texture Paste Embossing technique!! HOLY CRAP! while this might be a more limited application...it does have a WOW factor! I never really like the Queen's Gold EP, but it was the first jar I grabbed, and it was perfect for this...adding the Hickory smoke, salty ocean and peacock feather inks, and it popped!
 So there is my day 3 experiences...I have 2 lessons to catch up on (I have never liked my collages, so that is a "if there's time" one) plus whatever today holds...yup, I really need to retire!!
Thanks for stopping by.
Oh and am I the only one that smells lemon custard with the transparent glossy texture paste?
Wednesday, August 3, 2016
Creative Chemistry 103: Day 2 Post 3 Luminous Mica
 My “quick” technique for the night. (I think I need to play hooky from work to
keep up!) This is a great background!
My “quick” technique for the night. (I think I need to play hooky from work to
keep up!) This is a great background!
While
I was planning on being lighter, then using snowflakes, it got a bit dark. Instead of a tag, I cut a manila file into
the postage stamp. As my files are all
beyond the reuse stage at work, they are pretty worn, so the paper really
absorbed the water! I may not finish
this as intended, but in person, this is so rich looking! It won’t be going to
waste!
Creative Chemistry 103: Day 2 Post 2 Distress Paint Lifting
Since I watch the class videos during my lunch hour, it
made for a long afternoon as I couldn’t wait to try this this evening. I had posted a question after watching the
video if we can substitute gesso for the picket fence distress paint, and Tim
replied…”I’m sure you could, give it a try”…so here we go.
Studio Gesso is the left page, and the Distress Paint is
on the right. I admit, I wasn’t overly
careful on the application, and it was pretty thin so it could dry while I did
the resist technique…
My first impression: the following paints seemed to stick
and stay put on the gesso, but they were slipperier on the distress paint. Acted sort of like a glazing agent had been
applies as I was spreading them around.
But aside from that, the technique worked the same, and visually I can’t
tell the difference.

I tried not to overthink the paints, but then once done,
while pleased with the techniques, the rest of my page idea sort of fell apart. So out came a new stamp set (Woodware)…and I
should know better, as I rarely get good stamped images once the book has been
worked in. I tried to use the MISTI to
get a solid surface behind the page, but I only have the mini one, and as it
becomes enclosed with the frame, it’s pretty much impossible. And as these were clear stamps, I couldn’t
hand hold them to push them down; I would have tried if they were on cling
foam. Ah well.
I’ll try another this weekend.
Creative Chemistry 103 Day 2 Post 1 Distressed Paint Resist

I need to resist more! No, really…’cause I love the
look. My stamp choice probably not the
best, or maybe the Spun Sugar not the best choice, but I love how this came
out; not sure what I’ll do with it, again with the start of the bird, but I’ll
think of something, so stay tuned.
Actually, while typing, hmmm, I have a bird die...yes stay tuned...and idea is peculating...
Subscribe to:
Posts (Atom)